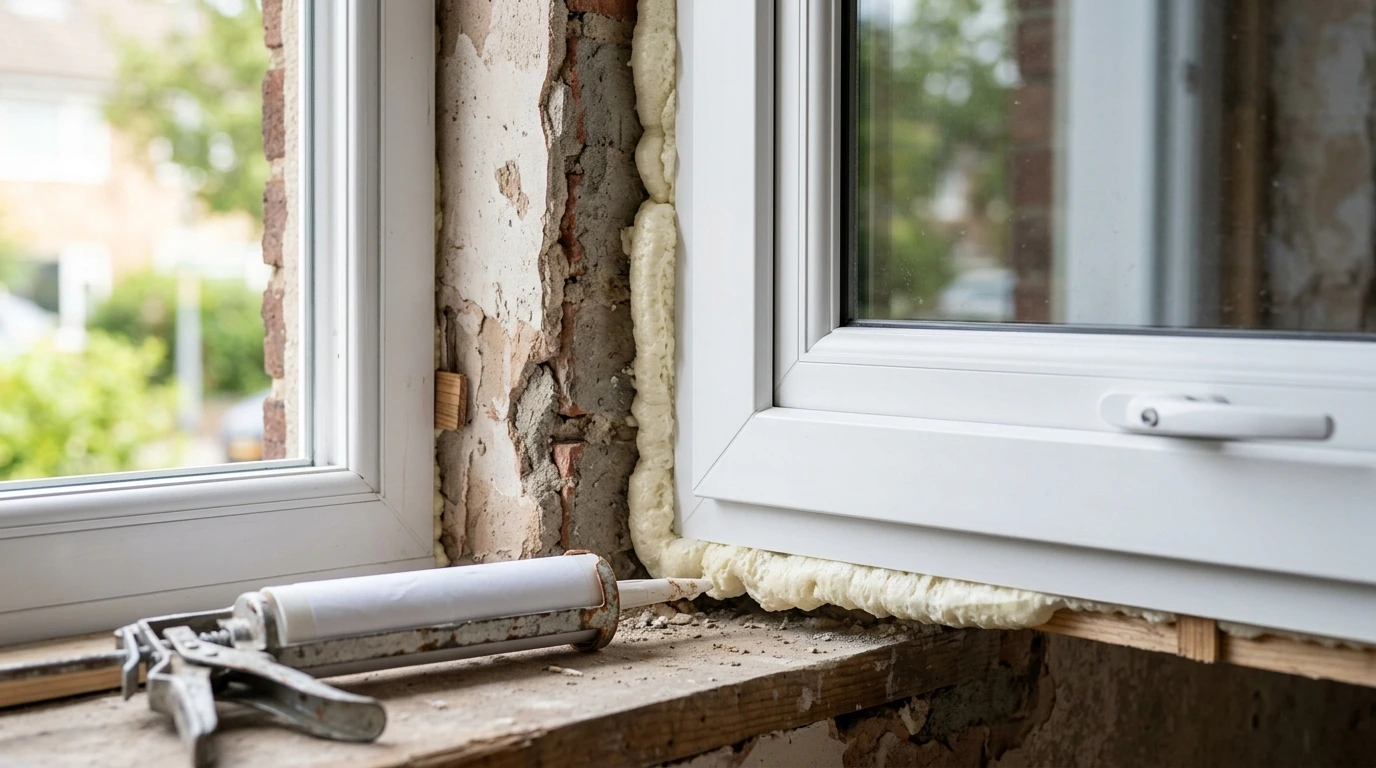
Window installation insulation is the part of the job you never see once the trim is on, yet it plays a large part in how warm, dry and draft-free the opening stays over the years. A high-performance window set in a poorly sealed opening can still leak air, collect frost at the corners and let water into the wall. This guide explains what happens in the gap between the new window and the wall: the low-expansion foam, the backer rod and sealant, the membranes and flashing, and the order in which they go in.
The Gap Around the Window: Why It Matters
A new window is never installed tight against the wall. The installer leaves a small, deliberate gap all around the frame, between the window and the rough opening or the old frame. This space lets the window be shimmed level, plumb and square, and gives it room to expand and contract with the seasons.
That gap is also the weakest point of the whole opening. If it is left empty, poorly filled or sealed only on the outside, warm indoor air leaks out through it, cold air leaks in, and moisture from the house can condense inside the wall. In a Quebec winter, this can show up as drafts around the trim, cold spots on the interior sill and frost forming in the corners of the window frame.
Good installation treats this gap as three separate jobs: insulating it, sealing it against air on the inside, and protecting it from water on the outside. Each one uses different materials, and each one matters.
Shimming and Fastening Come First
Before any insulation goes in, the window must be properly set. The installer places shims at the bottom and along the sides, at the points where the window is fastened, so the frame is supported without being bent. A window that is out of square or bowed will not close evenly, and no amount of foam or sealant can fix that afterwards.
Once the window is level and plumb and the sashes open and close smoothly, it is fastened through the frame or with clips into the structure. Only then does the installer check the operation again and move on to insulating the gap.
Low-Expansion Foam: The Right Way to Insulate the Gap
The most common way to insulate the space around a window today is with a polyurethane spray foam made specifically for windows and doors. Its key feature is low expansion: it fills the gap and bonds to both sides without building up enough pressure to push the frame inward. Regular high-expansion foam sold for large cavities can bow a window frame, and a bowed frame means sashes that stick and locks that no longer engage.
Applied correctly, low-expansion foam fills the gap continuously, without voids, and also contributes to the air seal, although it is usually combined with a sealant or tape on the interior side. The installer usually fills from the interior side, leaving room for a backer rod and sealant, and trims the excess once it has cured. Older methods relied on stuffing fibreglass or mineral wool into the gap; this insulates, but it does not stop air on its own and must be paired with a proper air seal.
- Use foam labelled for windows and doors, with low expansion
- Fill the gap continuously, without voids or overfilling
- Check that the sashes still open and close after the foam cures
- Trim the excess flush before installing the interior trim
Backer Rod and Sealant: Sealing the Joints
Where the window meets the wall finish, inside and out, the joint is closed with a sealant, often called caulking. For the sealant to last, it needs the right shape. A backer rod, a round foam cord pushed into the joint, controls the depth of the sealant and gives it something to rest on, so the bead is thin in the middle and well bonded on both sides. This shape lets it stretch and compress as the materials move with the temperature.
On the exterior, the sealant is the first barrier against rain and melting snow at the joint between the window and the cladding, brick or stone. It must be a product designed for exterior use and suited to the temperature on installation day, which matters in fall and winter. Inside, a sealant or tape bridges the joint between the window frame and the wall's air and vapour barrier, completing the air seal on the warm side of the wall.
- Backer rod: sized to the joint, pushed in to a consistent depth.
- Exterior sealant: rated for outdoor use and for the application temperature.
- Interior seal: connects the window to the wall's air and vapour barrier.
- Bead shape: continuous, bonded to both sides, without gaps or bubbles.
Membranes, Sill Pans and Flashing
Foam and sealant handle air and heat, but water needs its own protection. In a full-frame installation, the rough opening is first lined with self-adhered membranes. At the bottom, a sill membrane or sill pan with turned-up ends and a raised back edge catches any water that gets past the window and leads it back outside instead of into the wall.
The membranes on the sides and the head are lapped like shingles: the lower piece goes on first, and each upper piece overlaps it, so water running down always flows over a joint, never behind it. Above the window, a drip cap or head flashing sheds water away from the top of the frame. These details are hidden once the cladding and trim are back in place, which is why it is worth asking about them before the work begins. Our page on window installation describes the main steps.
What to Check During and After Installation
You do not need to be an expert to keep an eye on the essentials. Before the interior trim goes on, ask to see the gap around one window: it should be filled evenly with foam, with no daylight or empty pockets. Ask what membrane is used under the sill and how the exterior joint will be finished.
After installation, open and close each window and check that it operates smoothly and locks tightly. During the first cold spell, run your hand around the trim on a windy day and look for frost in the corners of the frame. Some condensation on the glass can come from indoor humidity, but cold air coming from around the trim or frost on the frame itself can point to a gap in the seal. Good insulation around the window also supports the energy efficiency of the glass and frame you chose.
- Gap filled evenly with low-expansion foam before the trim goes on
- Membrane or sill pan under the window in a full-frame installation
- Continuous exterior sealant with no gaps at the corners
- Interior seal connected to the wall's air and vapour barrier
- Sashes that open, close and lock smoothly after the foam cures
Talking About Installation With a Free Estimate
The products you choose matter, but so does what goes around them. If you feel drafts around the trim of existing windows, see frost in the corners of the frames or find water stains under a sill, the problem may well be in the gap around the window rather than in the glass, and it is worth having a professional look at it. When you compare proposals, ask each installer to explain how the gap will be insulated, how the joints will be sealed and how water will be managed at the sill and the head. The cost of the work depends on the openings, the installation method and the finishing, so it varies from one home to another.
Unisson Groupe manufactures and installs windows and doors and serves homes across Greater Montreal from Saint-Laurent. Browse our PVC windows and other window styles, then request a free in-home estimate to discuss your openings and the installation details that matter for each one.
Frequently Asked Questions
What type of foam should be used around a new window?
A low-expansion polyurethane foam made for windows and doors. It fills the gap and seals against air without pushing the frame inward. High-expansion foam meant for large cavities can bow the frame and make the window hard to operate.
Is caulking enough to seal a new window?
No. Caulking closes the visible joints, but the gap behind it also needs to be insulated and air-sealed, usually with low-expansion foam. A backer rod behind the caulking helps the bead stay flexible and bonded.
What is a backer rod used for?
A backer rod is a round foam cord pushed into a joint before the sealant is applied. It controls the depth of the sealant and gives it the right shape, so it can stretch and compress with the seasons without tearing.
Why is a sill membrane important?
Some water can find its way past a window, especially in wind-driven rain or during a thaw. A sill membrane or sill pan catches that water at the bottom of the opening and directs it outside instead of into the wall framing.
Why do I feel a draft around my new window trim?
Often because the gap between the window and the wall is not fully insulated or sealed on the interior side. You can ask the installer to remove the trim on one window to check the foam and the interior air seal.